Project
What I wanted to build was a little device that tracks the temperature and humidity and stores the sensor data in a database; and I wanted to build a simple UI to visualize the data. I am particularly curious to find out about the effects of venting or other activities in different rooms the house. But let’s start simple! 🙂
This is not meant to be a step by step guide on how you can build your own project. You might find parts useful, specifically regaring the code (connecting to Firebase, WiFI, reading DHT22 sensor): feel free to use it. Always be careful when dealing with batteries, lithium ion batteries are dangerous if not handled correctly (e.g. short circuit).

Shopping List
- ESP32 developer board – I use the Firebeetle ESP32 IOT from DFRobot
- DHT22 temperature and humidity sensor
- (battery, to operate without cables, works well via USB as well)
Wiring
The wiring couldn’t be simpler. I am using a DHT22 temperature and humidity sensor which is pre-calibrated and you only need to connect three pins:
- VCC
- Data (any GPIO pin, on the Firebeetle one of D0 to D9)
- GND
It is advised to use a pull-up resistor together with a DHT22, but I have not integrated one. Please note I am using a breakout board, no specific reason, it’s just what I got when I ordered the sensor. The sensor itself has 4 pins, one is not connected (nc).
Software
The software is the more interesting part for this project I believe. Find the code below and some explanations later.
- read the sensor data
- connect to my WiFi
- setup a Firebase RTDB
- connect the ESP32 to the Firebase RTDB
- store the data in the RTDB
- write an Angular app to visualize the data
#include <WiFi.h>
#include <Firebase_ESP_Client.h>
#include "DHT.h"

#define DHT22_PIN D2
#define DHTTYPE DHT22

// WiFi
const char* ssid = "xxxx";
const char* password = "xxxx";

DHT dht(DHT22_PIN, DHTTYPE);
FirebaseData fbdo;
FirebaseAuth auth;
FirebaseConfig config;
String chipId;

void setup()
{
  Serial.begin(115200);
  initWiFi();
  initDHT();
  initFirebase();
  registerDevice();
}

void initWiFi() {
  WiFi.mode(WIFI_STA);
  WiFi.begin(ssid, password);
  Serial.print("Connecting to WiFi ..");
  while (WiFi.status() != WL_CONNECTED) {
    Serial.print('.');
    delay(1000);
  }
  Serial.println(WiFi.localIP());
}

void initDHT() {
  dht.begin();
}

void initFirebase() {
  config.host = "xxxx";
  config.api_key = "xxxx";
  auth.user.email = "xxxx";
  auth.user.password = "xxxx";
  Firebase.begin(&config, &auth);
}

void registerDevice() {
  chipId = String((uint32_t)ESP.getEfuseMac(), HEX);
  chipId.toUpperCase();

  if (Firebase.ready() ) {
    Firebase.RTDB.setString(&fbdo, "/devices/" + chipId + "/name", chipId) ;
  }
}

void loop()
{
  float temp = dht.readTemperature();
  float hum = dht.readHumidity();

  if (Firebase.ready() ) {
    FirebaseJson json;
    json.set("t", temp);
    json.set("h", hum);
    Firebase.RTDB.pushJSON(&fbdo, "/devices/" + chipId + "/sensors/climate", &json);
    String dataPath = fbdo.dataPath() + "/" + fbdo.pushName();
    Firebase.RTDB.setTimestamp(&fbdo, dataPath + "/ts");
  }
  delay(5 * 60 * 1000); // only every 5min
  //delay(2000);
}
Required Libraries
- DHT
- Firebase
- Unified Sensor support
Adding Libaries
In the Arduino IDE (Library Manager) I installed:

and…

and…

(which I actually installed by adding the zip file manually, following the instructions here.)
Create Firebase Project
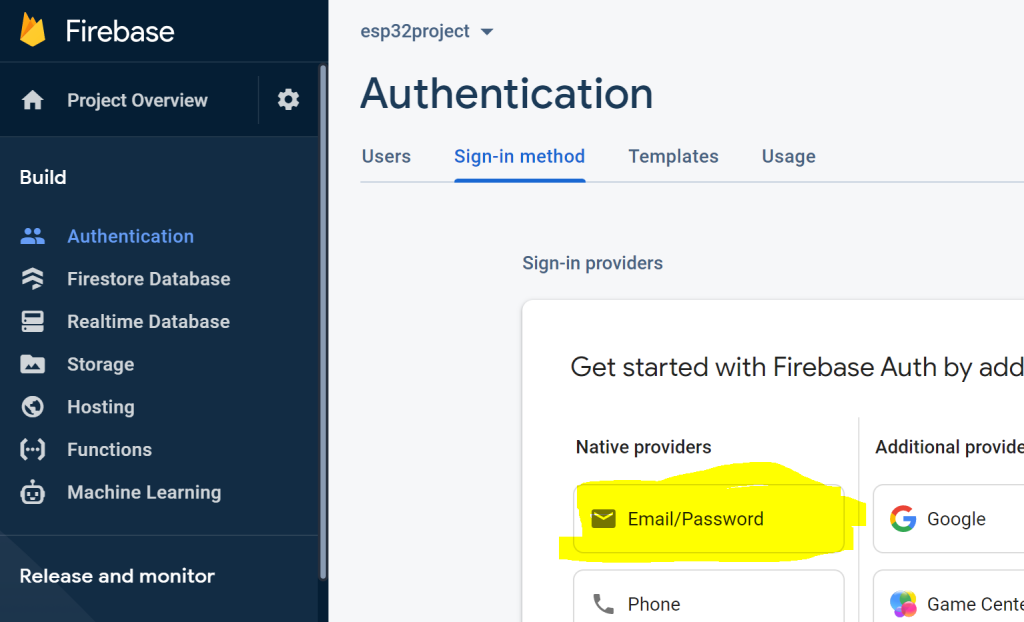
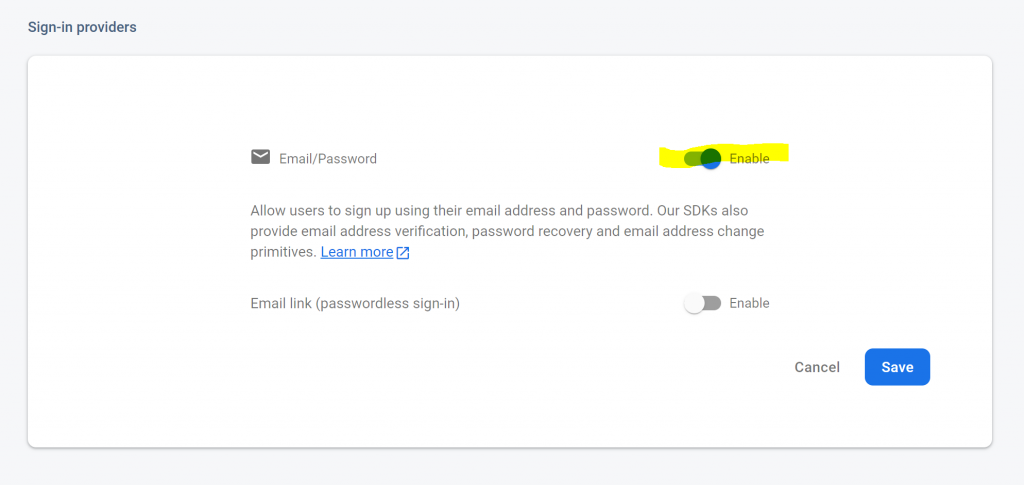
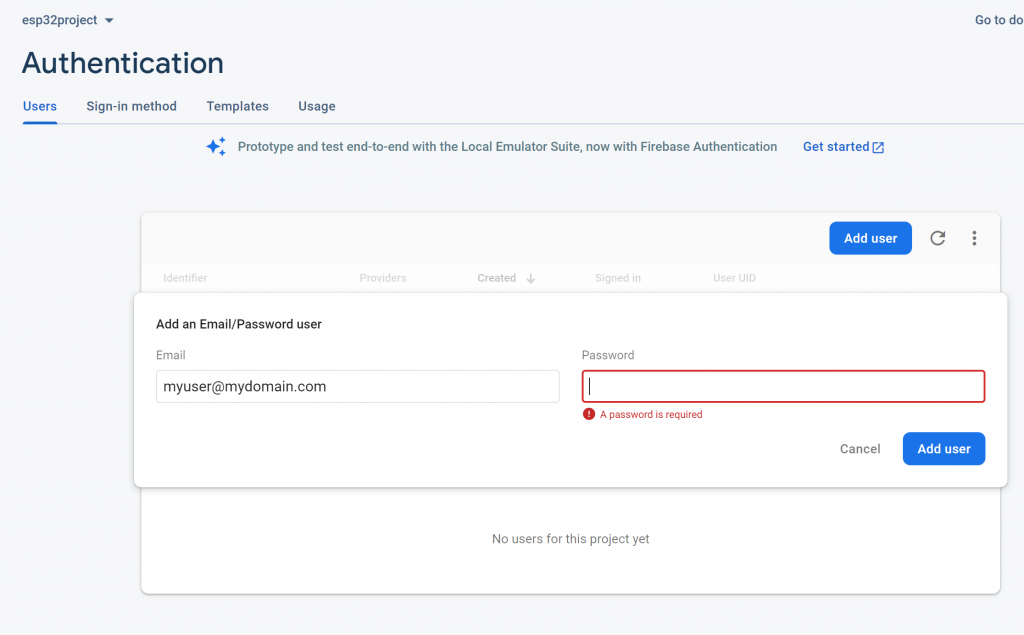
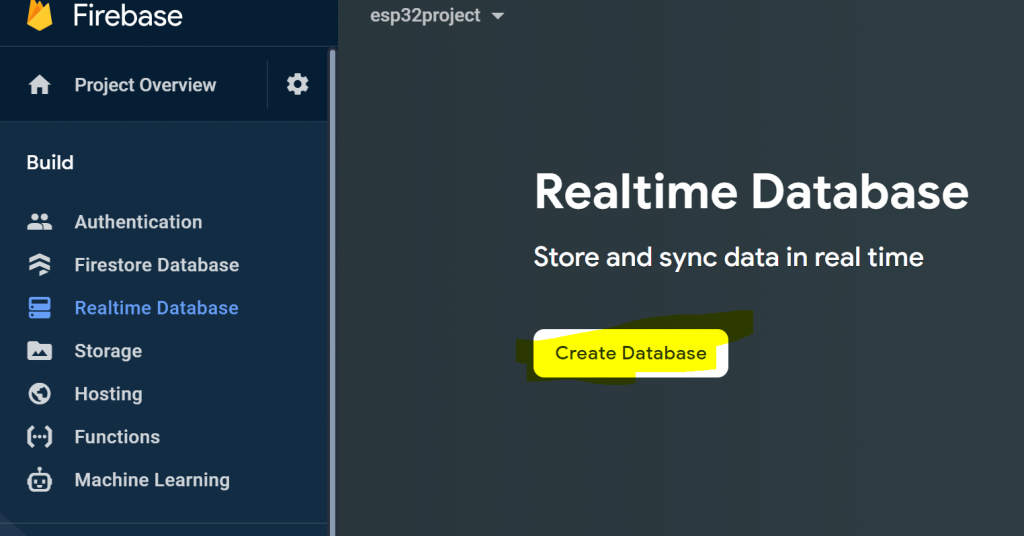
I assume you have basic understanding of Firebase and how to create a project. If not there are many tutorial out there to learn more. For this particular project I had to:
- create the project
- manually create a user
- create a web app
- create real time database



Connect to WiFi
Connecting to my WiFi network is also quite simple:
void initWiFi() {
  WiFi.mode(WIFI_STA);
  WiFi.begin(ssid, password);
  Serial.print("Connecting to WiFi.");
  while (WiFi.status() != WL_CONNECTED) {
    delay(1000);
  }
  Serial.println(WiFi.localIP());
}
Obviously you should know to which WiFi to connect, just put replace the ssid and the password accordingly. 😉
const char* ssid = "xxxxxxx";
const char* password = "xxxxxxx";
Connect to Firebase
With a stable WiFi connection I was able to connect to my Firebase RTDB. Using the library mentioned above this doesn’t require many lines of code.
void initFirebase() {
  config.host = "xxxx";
  config.api_key = "xxxx";
  auth.user.email = "xxxx";
  auth.user.password = "xxxx";
  Firebase.begin(&config, &auth);
}
The API key can be found in the project settings, look for Web API key.

The host can be found here:

The user/password should be clear, as we created it before ourselves.
Store Data
Now that the connection to Firebase is setup, I can read or store data.
Setup
In the setup I read the chip id and use it as the name. First of all it was a good first test to store data and secondly I intend allowing to change the name on via Bluetooth.
 void registerDevice() {
  chipId = String((uint32_t)ESP.getEfuseMac(), HEX);
  chipId.toUpperCase();

  if (Firebase.ready() ) {
    Firebase.RTDB.setString(&fbdo, "/devices/" + chipId + "/name", chipId) ;
  }
}
Loop
In the loop function I’m reading the sensor data and create a JSON object with the values. Then I add the current timestamp. Altough the code is simple I’m sure this can be done in a more efficient way. Mainly I’m not convinced Firebase is the right choice to store sensor data, but it’s cool you can connect an ESP32 with their DB and the API is easy to use.
void loop()
{
  float temp = dht.readTemperature();
  float hum = dht.readHumidity();

  if (Firebase.ready() ) {
    FirebaseJson json;
    json.set("t", temp);
    json.set("h", hum);
    Firebase.RTDB.pushJSON(&fbdo, "/devices/" + chipId + "/sensors/climate", &json);
    String dataPath = fbdo.dataPath() + "/" + fbdo.pushName();
    Firebase.RTDB.setTimestamp(&fbdo, dataPath + "/ts");
  }
  delay(5 * 60 * 1000); // every 5min

}
Client Application
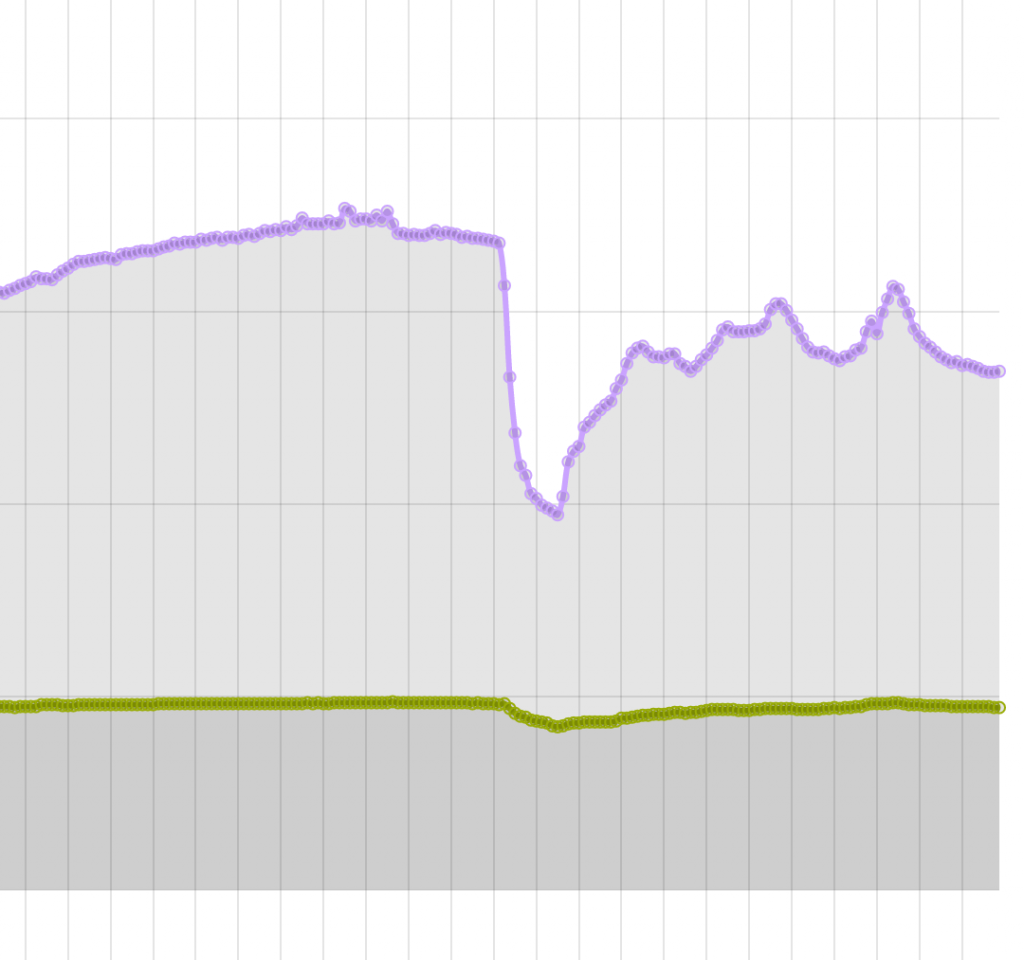
Now that everything works and data is stored in Firebase, it is time to create a client application to visualize the sensor data. If I find some time I will describe this part in another blog post. But it looks like this in its current stage:
Next
It would be cool if I could just add another device in a room and it would automatically start collecting data and store it. I guess similar products exist anywys already, but the fun lies in DIY. 🙂
Nevertheless, what I would like to improve:
- 3D printed box to house the electronics and the battery
- Provide a way to configure WiFi, name of the device via Bluetooth
- Find a better way to store the data, I don’t think Firebase RTDB is the right choice here (maybe ThingSpeak or AskSensors, …)
- Rewrite code to enable deep sleep mode between sensor reads
Conclusion
Microcontroller programming is a topic I had on my todo list since many years. I tried differnet things, but I never got any project done. Meanwhile I have several bread boards, many (really many) resistors, a few ICs, a Raspberry Pi, an Arduino board and since a few days an ESP32 developer board!
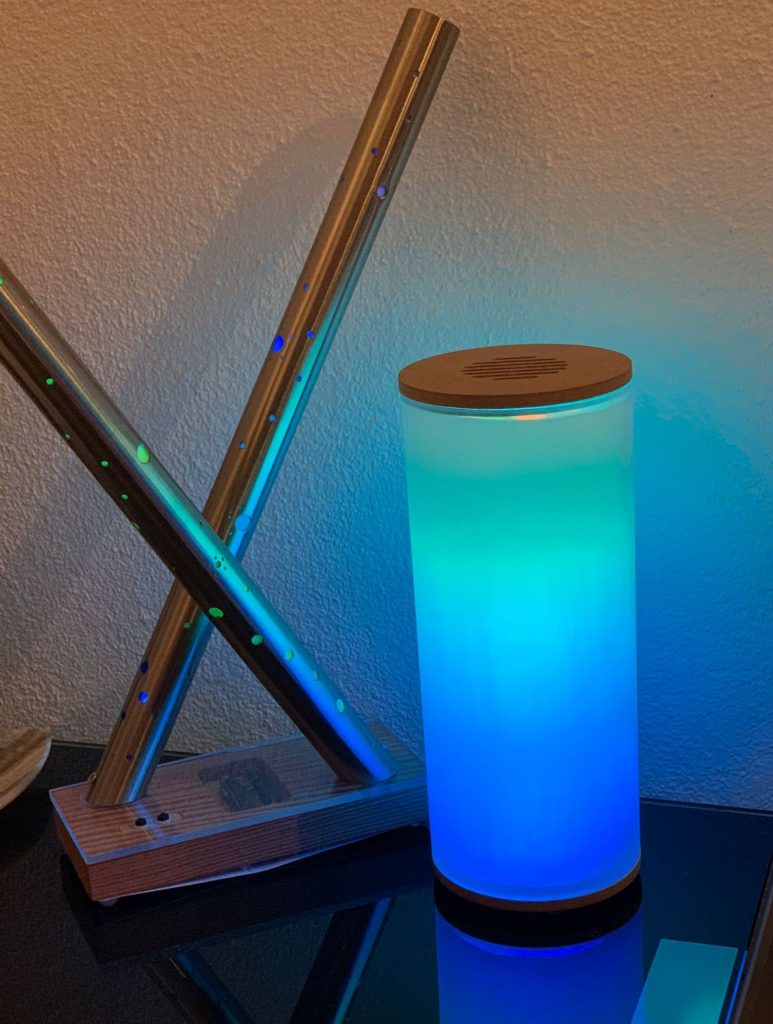
I actually bought a starter kit with some sensors and a little book included, I have to say it made it easy to get started and the ESP32 really got me hooked! Unfortunately the board isn’t alive anymore, so I had to switch to the Firebeetle. I can’t imagine an easier way to create an IoT project – WiFi and Bluetooth is aboard! Thanks Fabian Merki for pointing me in this direction! Fabian is creating music boxes with cool light effects using the ESP32 and he was always helping in case I had some issues with my setup. 🙂
Overall the project was really fun and I learned quite some things. It’s incredibly easy to connect to the internet and connect to a Firebase RTDB is just powerful.