I’ve already learned quite some stuff about Azure networking on my way to become Azure Solution Architect. Reading is great, but hands on experience is really helpful to strengthen the knowledge. But how to start?
Luckily there is an Azure Free Account. Subscribing to it is very easy and you get a bit of play money. Starting on a fresh subscription makes sense in my view as you can play around with the most basic building blocks easily and it’s not yet polluted with a lot of mysterious stuff that someone else has created.
Altough I already knew about some of the basic concepts it is still great to play around with them to understand better how things relate. So here are a bunch of things I learned after playing around on my fresh subscription for a few hours.
The below may not be 100% accurate. It’s just how I personally understand the concepts after a few hours of usage. So apologies for any misinformaiton.
Portal
The Azure portal is the web application that you can use to administrate your Azure resources. Not sure if you can find every option for every little detail, but the most common tasks can be done here (creating VMs, networks, etc.). To get started I think the portal is really good. In practice you would rather use another option (PowerShell, Azure CLI, ARM templates).
Subscription
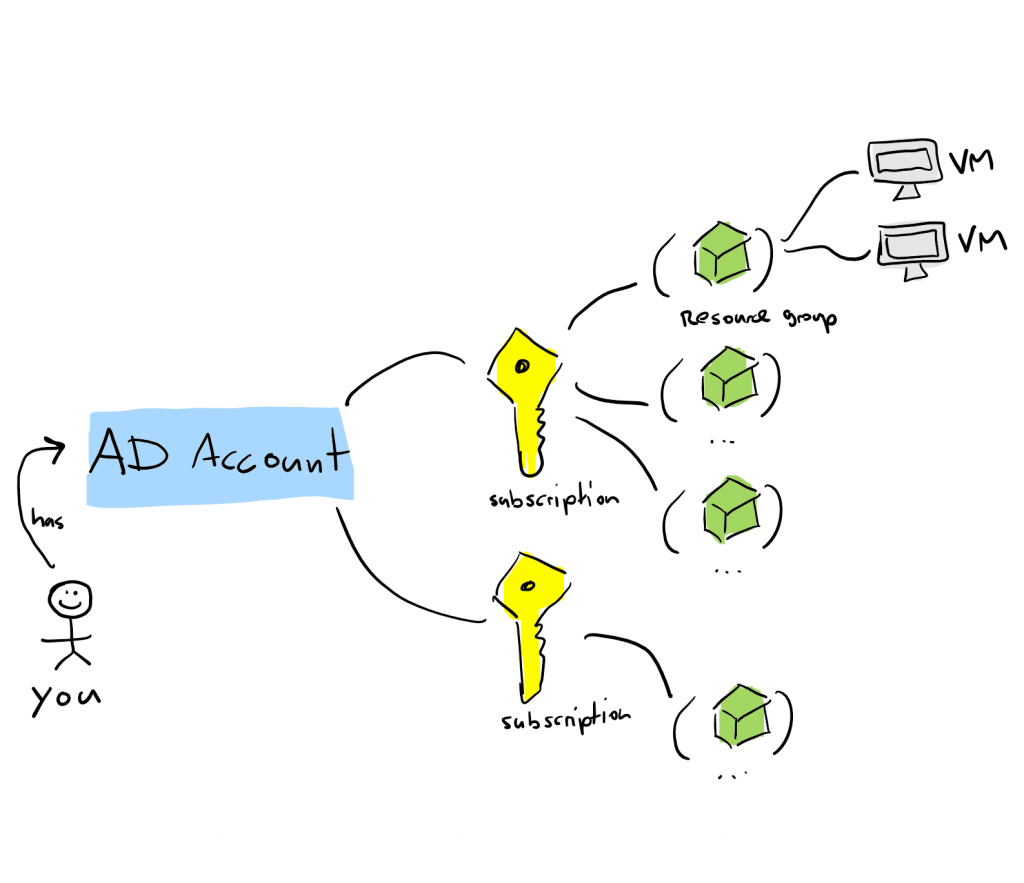
Everything starts with a subscription. The subscription is the root building block for which you can have access. If you create the free Azure account they create a subscription for you and add your user as the administrator thereof. Your Azure (or Microsoft AD?) identity lives separately from the subscription, you can get access to one or many subscriptions.
Microsoft bills you based on the subscription, so you could use subscriptions to organize your organization along this dimension (e.g. one subscription per team, per solution, environment, ..). This really depends on your organization.
I’m not sure how flexible you can move resources between subscriptions (or if it is possible at all). I need to try that out later.
Resource Group
Inside a subscription you can manage resource groups. Resource groups are acting as containers for your resources (e.g. they contain your VMs). When you create a resource group you have to specify the location. For me this was not clear at first, but after reading a bit about it: the meta data about the managed resources are stored within the resource group – so you basically decide where this information is stored.
VM
Creating a virtual machine is really simple. You just click through the wizard and you have your VM up and running. A VM is a resource like everything else. I started off creating two Linux virtual machines using the Ubuntu image. Ultimately I want to play around with the networking. But it is quite an experience to create a VM without any hurdles. After a few minutes you can SSH into your VM and do whatever you like.
Step by Step
I guess this article is more like a diary and writing stuff down helps me to describe the concepts in my own words. But I assume the value for the readers is rather limited. So to have something useful here is the step by step instructions.
1. Create a Resource Group
You can create a RG alongside creating a VM. But I decided to create it separately, starting with the subscription.first click on the subscriptions tile to get to your subscription.
List subscriptions
If you are on the home screen of the portal, click on the “subscriptions” title in the top section.
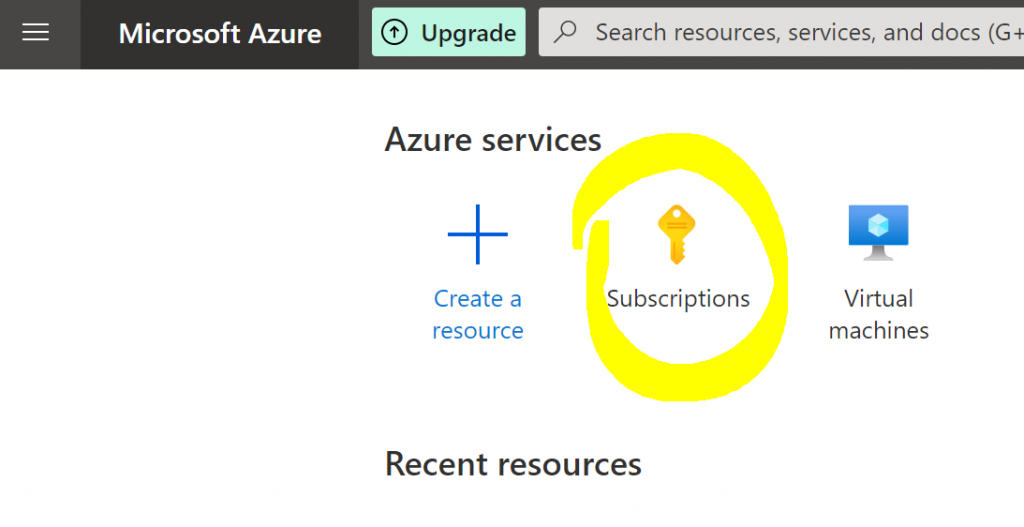
This will lead you to an overview screen where you see all your subscriptions. Here you could also add additional subscriptions. But for now just click on the subscription that was generated for you for the free account.

Which leads you to the details of the subscription. Here you can find a lot of useful information, but for now we want to create two new resource groups inside the subscription. You find the resource groups on the left hand navigation.
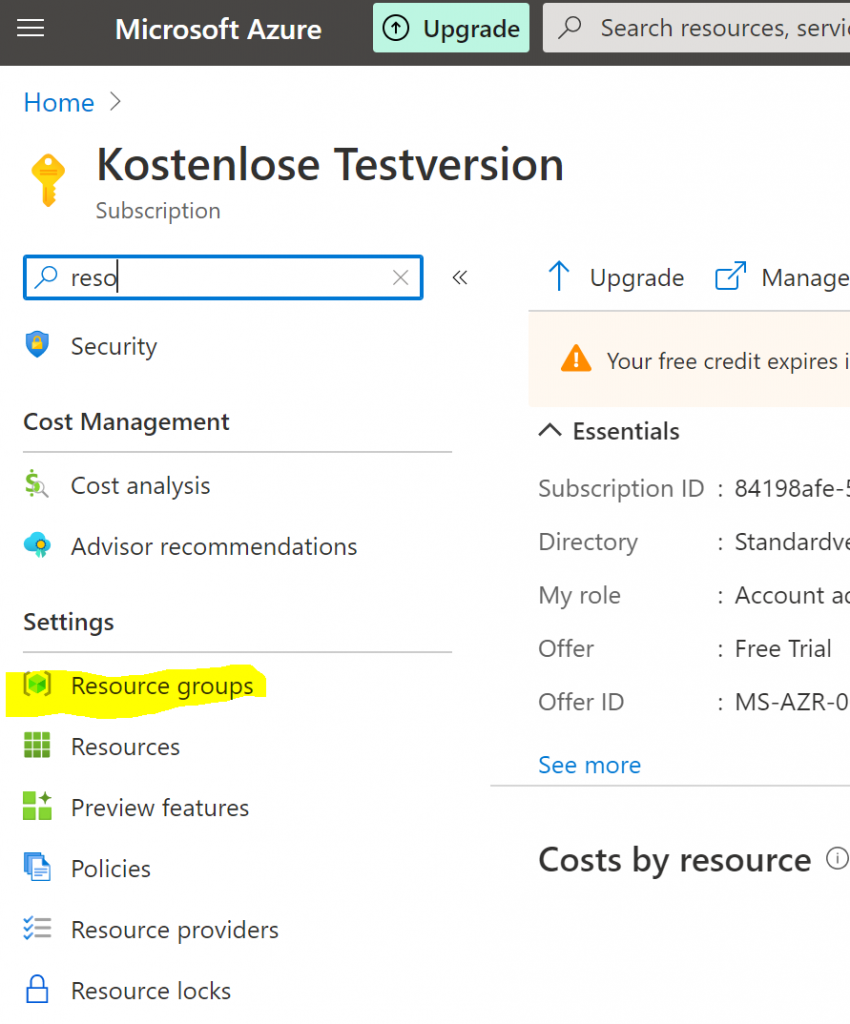
This brings you to the overview page for all RG in the selected subscription. Here you can create new RG.
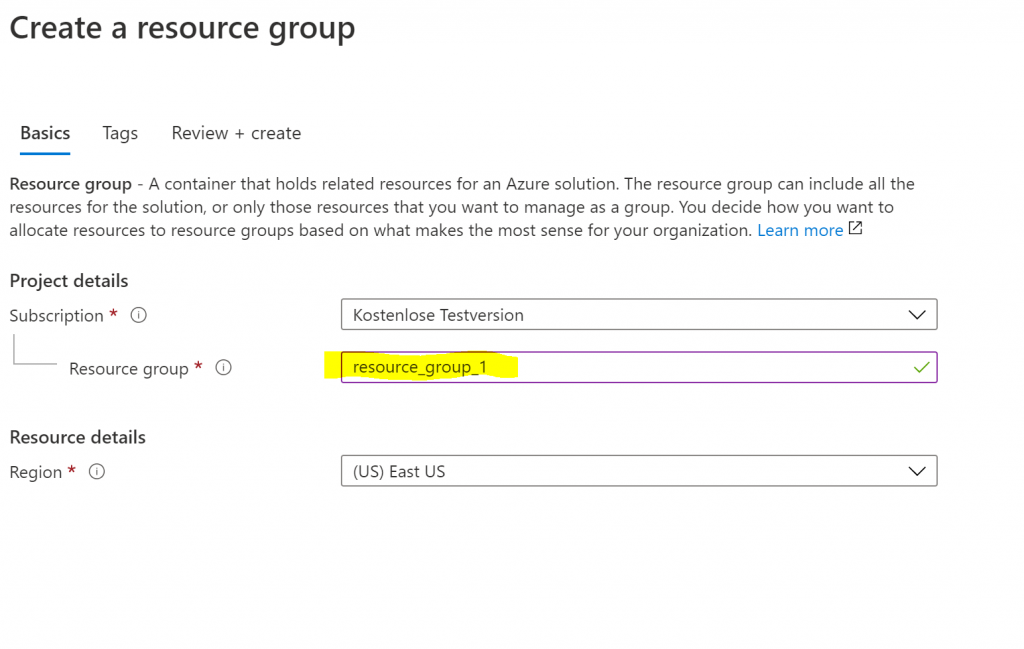
You bascially need to pass a name. The region is relevant for storing the meta-data about the resources managed inside the resource group. So you can still create VMs wherever you like, it is not limiting you later.
2. Create a VM
Now that we have a resource group, we can create resources belonging to the group. Let’s create a Linux VM. Let’s start from the home screen.

Next hit the add button to start the VM creation wizard.

I created a Linux VM with the Ubuntu image and decided to start with a username/password login. To reach the VM from the machine I allow inbound ports via SSH and HTTP .
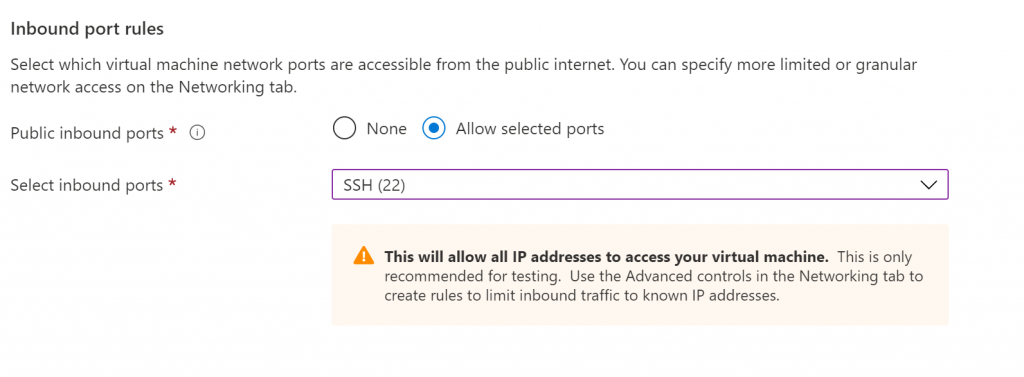
After hitting the review and create button, everything is validated and if your selections are OK you can hit the create button and your VM is provisioned and after a few minutes ready to use.
Summary
- you can have access to one or many subscriptions
- subscriptions are the level on which you are billed
- organization of subscriptions is depending on the organizational structure (e.g. per team, per environment, etc.)
- resource groups organize resources logically, whatever that means for you (depends on the organization in your company)
- VMs and other resources are bound to a resource group
- Creating a VM can be done in a few simple steps going through the wizard
- Whenever I wanted to know a bit more about an option it was really simple to find the documentation. The documentation is really good!
